Quick Answer
Contouring and highlighting use shade and light to add dimension and definition to the high and low points of the face. The easiest way to learn how to apply contour makeup is to use a small amount of product, place it where you want depth, and blend until the edges disappear.
- Prep skin with moisturizer + primer
- Apply foundation (your normal shade)
- Choose a cool toned matte contour shade (2–3 shades deeper)
- Apply contour to hollows of cheeks, jawline, nose sides, temples/hairline
- Blend, blend, and blend again (upward/outward)
- Highlight cheekbones, bridge of nose, center of forehead, cupid's bow
- Set strategically with powder for longevity
Contour is essentially strategic shadow placement. By adding subtle depth in the right areas and blending it so it melts into the skin, you create the illusion of more defined facial structure.
When done correctly, contour doesn’t look obvious or heavy. It quietly enhances your natural bone structure, adding dimension where the face would naturally fall into shadow. The goal isn’t to look sculpted or overdone—it’s to look balanced, lifted, and naturally defined.
This is a no-stress, beginner-friendly guide on how to apply contour makeup: how to choose the right shade and undertone, where to place it for your face, and how to blend in a way that keeps everything soft, seamless, and never muddy.
What Contour Actually Does (And Why It Works)
Contouring effectively involves creating the illusion of depth by applying darker shades to areas you want to recede or define. Highlighting emphasizes areas that naturally catch light. Together, contour and highlight change how the structure of your face reads, especially on camera.
Here's the simple rule: what you shade steps back, what you brighten stands out. The areas that are not darkened during contouring will look more prominent by contrast.
Contour vs Bronzer (Don't Mix Them Up)
Contour is meant to mimic real shadows, so it should be matte and usually cool toned or neutral toned. Bronzer is meant to add warmth, so it's more warm toned and goes where the sun naturally hits.
- Contour: shadows (hollows of cheeks, jawline, sides of the nose, hairline)
- Bronzer: warmth (forehead, cheeks, nose bridge—where you'd tan)
Pick the Right Formula: Cream Contour vs Contour Powder
The key to successful contouring is to use an opaque, matte product: an opaque matte powder, a liquid concealer, or a cream foundation. Which one you pick depends on your skin and the finish you want.
Quick Formula Picker
- Cream contour: dewy, forgiving, best for dry/normal skin and beginners
- Contour powder: matte, longer-wearing, best for oily skin (and super humid days)
- Liquid concealer: great for subtle sculpt + easy blending if you already use concealer
My personal rule: if I'm wearing a cream foundation, I'll usually stick to cream contour. If I'm wearing powder foundation or I'm extra oily, I'll go powder. For example, a softer powder like the Judydoll 2 in 1 Highlighter Contour Palette is much harder to overapply, which makes it ideal if you're still learning placement.
Choose the Right Shade (This Is Where Most People Mess Up)
Choosing the right contour shade is not about going super dark. It's about choosing a shade that's just a couple tones deeper than your skin tone and has the right undertone to mimic natural shadows.
- Pick a matte contour shade that's 2–3 shades darker (or shades deeper) than your skin.
- For a natural look, choose cool or neutral undertones to mimic real shadows.
- Avoid shades that look orange, overly pink, or weirdly grey on your skin.
Currently I use Sheglam Sun Sculpt Liquid Contour.
The "Two Shades" Reality Check
If you're nervous, start with two shades deeper (not three) and build. Starting with a light hand and gradually building up is always better than applying too much at once.
Step by Step Guide: How to Apply Contour Makeup
Prep Skin (So It Blends Like Skin)
- Moisturizer first (always)
- Primer if you want smoother texture or more longevity
- Then your foundation (your normal shade)
Contour sticks to dry patches and separates on oily spots, so prep matters more than the brand of contour.
Lay Down Your Base
Apply your foundation and blend it fully before you start applying contour. If you're doing a brighter under-eye, use a lighter concealer (or liquid concealer) now.
I don't do a super heavy base for everyday. The more foundation you pack on, the more your contour has to "fight" to show up.
Place Contour Where Shadows Naturally Fall
When contouring, apply the darker shade to the hollows of your cheeks, temples, hairline, jawline, or nose. Think of it as placing shadow, not color.
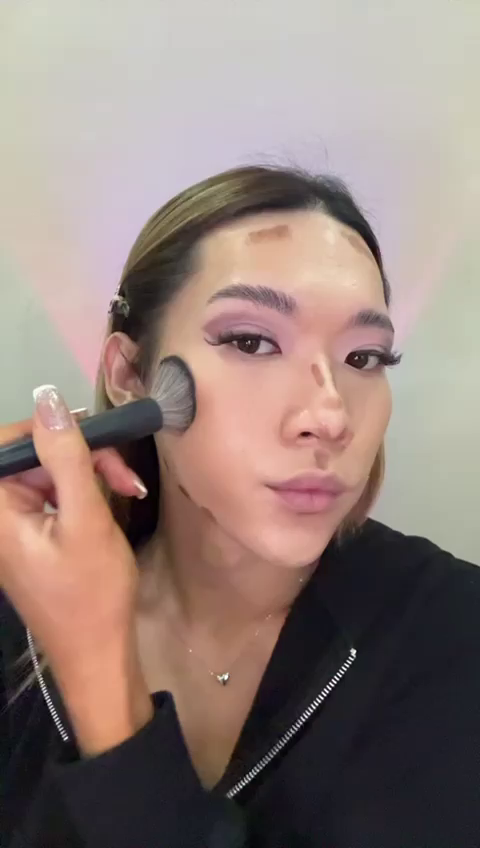
Cheeks
- Find the hollow under your cheekbones (gently suck in your cheeks).
- Start near the ear and stop before the center of your face.
- Keep it slightly higher than you think, so it lifts instead of droops.
Jawline
- Apply along the underside of the jaw to define.
- Blend down into the neck so you don't get a "mask line."
Forehead + Hairline
- Tap contour along the perimeter near the hairline and temples.
- This can visually balance a taller forehead or add structure.
Nose
- Use a tiny brush and apply on the sides of the bridge (very lightly).
- Blend until it looks like a soft shadow, not stripes.
Blend (Then Blend Again)
To avoid harsh lines, it's important to blend, blend, and blend again when applying contour and highlight. Use a damp sponge or a dense stippling brush and blend into the skin with small circular motions and tapping.
- Cheeks: blend upward toward the cheekbone
- Jaw: blend downward into the neck
- Hairline: blend inward, softly
Angled brushes are excellent for precise placement along cheekbones and jawline. Then I switch to a clean fluffy brush to soften the edges.
Highlight to Create Contrast
Highlighting is done by applying a lighter shade (or shimmer) to areas that naturally catch light. For highlighting, it's best to choose a foundation that's 1–2 shades lighter than your normal foundation shade, or use a lighter foundation / lighter concealer.
- Top of cheekbones (this is where you draw attention)
- Bridge of the nose
- Center of the forehead
- Center of the chin
- A tiny touch on the cupid's bow
- Optional: under the brow bones (keep it subtle)
It's best to stick to the same finish as your foundation for a natural look. Dewy base + cream highlight. Matte base + subtle powder highlight.
Set for Longevity
Setting with powder helps contour longevity. If you used cream contour, lightly set it (especially on oily areas).
- Oily skin: set more, especially T-zone and cheeks
- Dry skin: set lightly, mainly where makeup creases
Contouring by Face Shape (Use This as a Guide, Not a Rule)
Contouring by face shape should only be a guide to creating a flattering look. Your face shape, facial features, and bone structure are unique, so adjust based on what you want to emphasize or soften.
Round Face
A round face is about as long as it is wide. Contour along the outermost sides of the face to slim features: hollows of cheeks, jawline, and a touch at the temples.
Oval Face
Oval faces are well balanced. Keep contour light and focus just below the cheekbones, plus a touch around the hairline if you want.
Square Face
Square face shape tends to be more angular. Focus contour on the upper corners (temples/hairline) and lower corners (jaw) to soften and round out the edges.
Heart Face
Heart shaped faces often have wider cheeks/forehead and a more pointed chin. Add contour to the outer edges of the forehead and temples, and keep jaw contour soft.
Diamond Face
Diamond faces are widest at the temples/cheekbones. Focus contour on the lower half of the cheeks to create a slimmer appearance, and keep temple contour light.
Oblong Face
Oblong faces are longer than they are wide. Add contour to the top of the forehead near the hairline and a touch under the chin to visually shorten the face.
My "Don't Look Muddy" Rules
- Start with a small amount. Build slowly. Too much at once looks muddy.
- Use matte shadow tones. Cool toned or neutral toned shades mimic real shadows best.
- Blend until the edges vanish. If you can see where it starts and stops, keep blending.
- Check in natural light. Warm bathroom lighting can make warm shades look "fine" until you step outside.
- Don't mix finishes randomly. Powder base + heavy cream sculpt can get patchy. Keep textures compatible.
Mini Troubleshooting (Fast Fixes)
If your contour looks…
- Orange: your contour shade is too warm; go cooler/neutral.
- Grey: it may be too cool for your skin tone; choose neutral, not ashy.
- Muddy: you used too much; tap over it with a bit of foundation on a sponge and re-blend.
- Patchy: your base is too dry or you layered incompatible formulas; add moisture and use lighter pressure.
Maddie is here to share beauty knowledge and help you elevate your skincare and makeup routine. Love ya. 💕
Frequently Asked Questions
What's the difference between contour and bronzer?
Contour is meant to mimic real shadows and add dimension. It's usually cool toned or neutral toned and goes where shadows naturally fall. Bronzer adds warm shades where the sun would hit your face. Use both if you want a natural sculpt that still looks alive.
Should I use cream contour or contour powder?
Cream contour is easier to blend and more forgiving for beginners, especially on dry skin. Contour powder is great for oily skin and gives a more defined matte finish. You can set cream contour with powder for extra wear.
How do I choose the right contour shade?
Go 2–3 shades deeper than your skin tone and pick the right undertone to mimic natural shadows. Cool toned or neutral toned shades are safest. Avoid orange, overly pink, or ashy grey shades on your skin.
Where do I apply contour makeup?
Apply contour to the hollows of your cheeks, along your jawline, the sides of your nose, and lightly around the hairline and temples. Blend well so there are no harsh lines or edges.
Where should I apply highlighter?
Apply highlighter to the tops of cheekbones, bridge of the nose, center of the forehead, and a tiny touch on the cupid's bow. Highlighting draws attention to areas that naturally catch light.
Do I need to contour based on face shape?
Face shape guides (round face, oval face, square face shape, heart shaped faces) are helpful starting points, but they're not rules. Your facial features and bone structure matter more. Adjust placement based on what you want to define or soften.
What tools should I use?
Angled brushes are great for precise contour along cheekbones and jawline. A damp sponge helps melt cream contour into the skin. A clean fluffy brush is perfect for diffusing edges so everything looks well blended.
How do I make contour last?
Set strategically with powder, especially if you used cream products. Blot oil first, then set. Longevity comes from prep + thin layers, not piling on product.